Wednesday, November 25, 2015

Monday, June 22, 2015

Digipainting time

Here's my study for today, random pic from http://www.mapcrunch.com/

Sunday, May 3, 2015

Last figure painting at Angel Academy of Art


This is my last figure painting at Angel Academy of Art.
Below I have posted a step by step process of this painting.
But first, a GIF =)

GIF


Day 1 - Drawing 
I had a total of 24 days, 3 hours per day, to complete the painting. 
The first 2 days, I spent on my drawing

I was trying to get proportions right, and some articulation of the outline. 
I'm not being overly concerned with the exact articulation however.
I know that when I put more paint on I will lose a lot of the information anyway.
Also I'm using a fairly big brush to paint with, and a kneaded eraser to make finer lines. 
No medium. 


Day 3 - Dead coloring and big form modelling
Very simple big form modelling, no details.
I don't put in fingers, or other smaller individual shapes.
I'm just trying to make things look round and 3D.
I'm just using black and white for the figure.
And some other colors in the background, at this stage I just want something there, to be able to make better judgments.

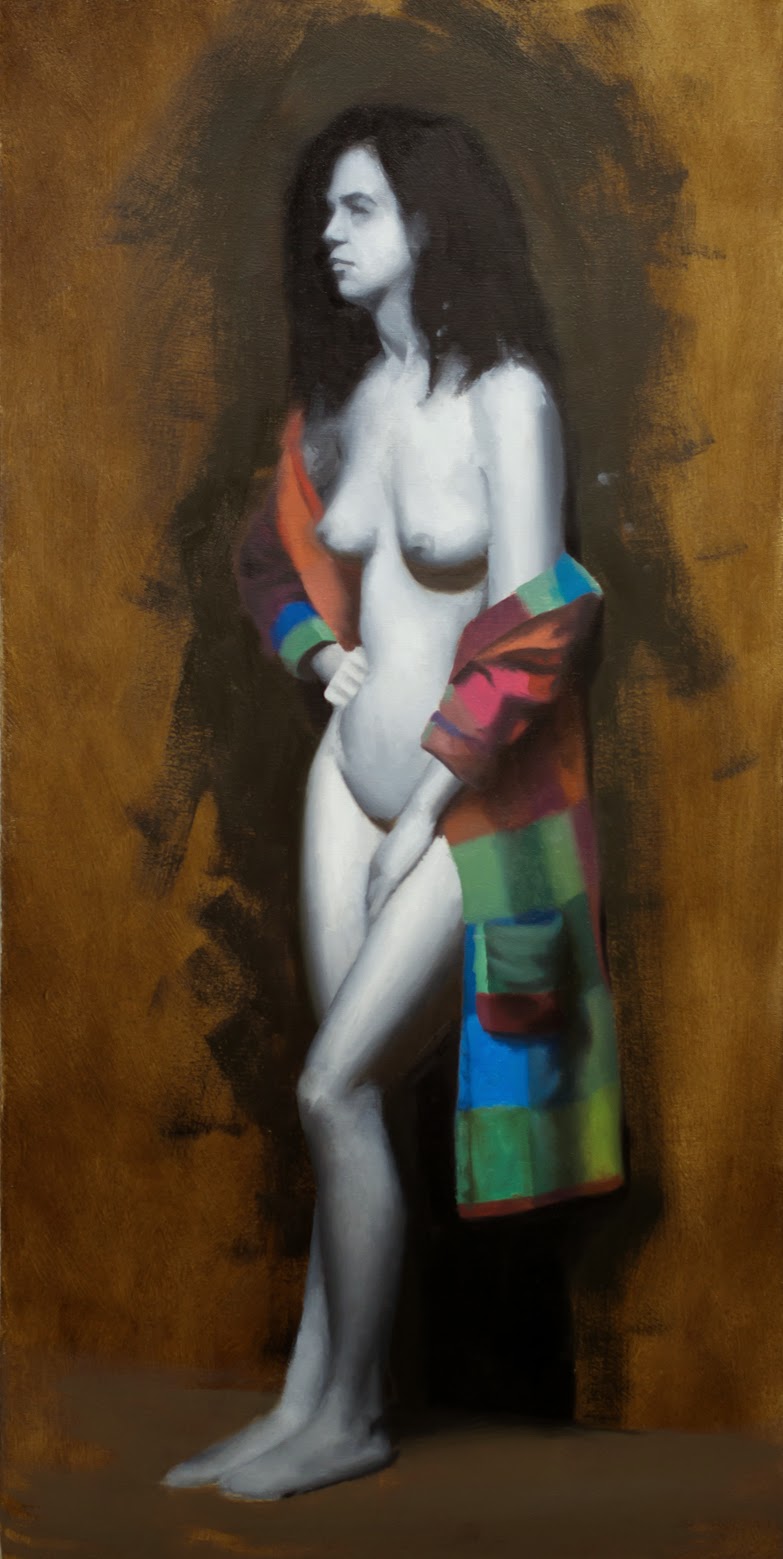
Day 7 - 1st painting
It's been another 4 days, and I have finished what we call 1st painting. 
The purpose of a 1st painting is to add the shapes and details that were missing in the big form modelling step. 
It is not supposed to look finished though. It can be very rough. 
And not every single detail is added, that is for a later rendering stage.

And don't worry, I know she looks mad, I'm working on it ;)


 Day 8 - Color lay in
Simple color lay in. Details disappear for fingers and such.
First the details disappeared when we added the big form modelling, then the details disappeared again when we did the 1st painting, and then AGAIN when we added the color on top.
So you see what I mean by not having to be too bothered with details in the beginning :)

Its painted fairly opaquely, but the purpose of having a lighter underpainting is that it will shine through.
Head was repainted with grisaille and was therefore not colored.
I also changed proportions of the feet. Things are not set in stone.

Day 10 - 2nd painted chest
So after we have finished filling in the whole figure with color, with similar values as the underpainting, its time to start 2nd painting. 
The purpose of 2nd painting is to render things until finished. 
You add more information than was there in the 1st painting, you would add details like creases in the skin, hue/value/chroma shifts and just being more particular with what colors you use. 

You want the skin too look smooth, but not too smooth, skin has a certain texture, and if you make it too smooth it will look artificial like plastic, and you cant have it too rough either.

I spend about one day on each part of the figure, so far I spent one day on the head, and one day for the torso.
Everything will get repainted 2 or 3 times. 
But I still want it to be as close to a finish as possible on my first try.

Day 12 - 2nd painted chest and leg
Two days has passed, and I have painted the leg and knee. 
But I also repainted the chest..

Some areas are sunken in, they look grey, its just the way oil paint dries, especially the darker parts.
Just oil it in and it regains its original value.
Don't put too much oil on though, use a mixture of oil and mineral spirits and use a makeup sponge.

Day 16 - 2nd painted arm, leg, feet
4 days, 4 new things painted. 
Arm, upper leg, lower leg and feet

Day 18 - 2nd painted hands, repainted chest 
Did the hands as well as repainted the chest area. 3rd time now, if anyone is keeping track ;)
Now I have actually 2nd painted the whole figure. But its not over yet! 
Since i have another week on this, I will address some areas I don't feel satisfied with.

Day 21 - Repainted the tummy, arm and added hair details
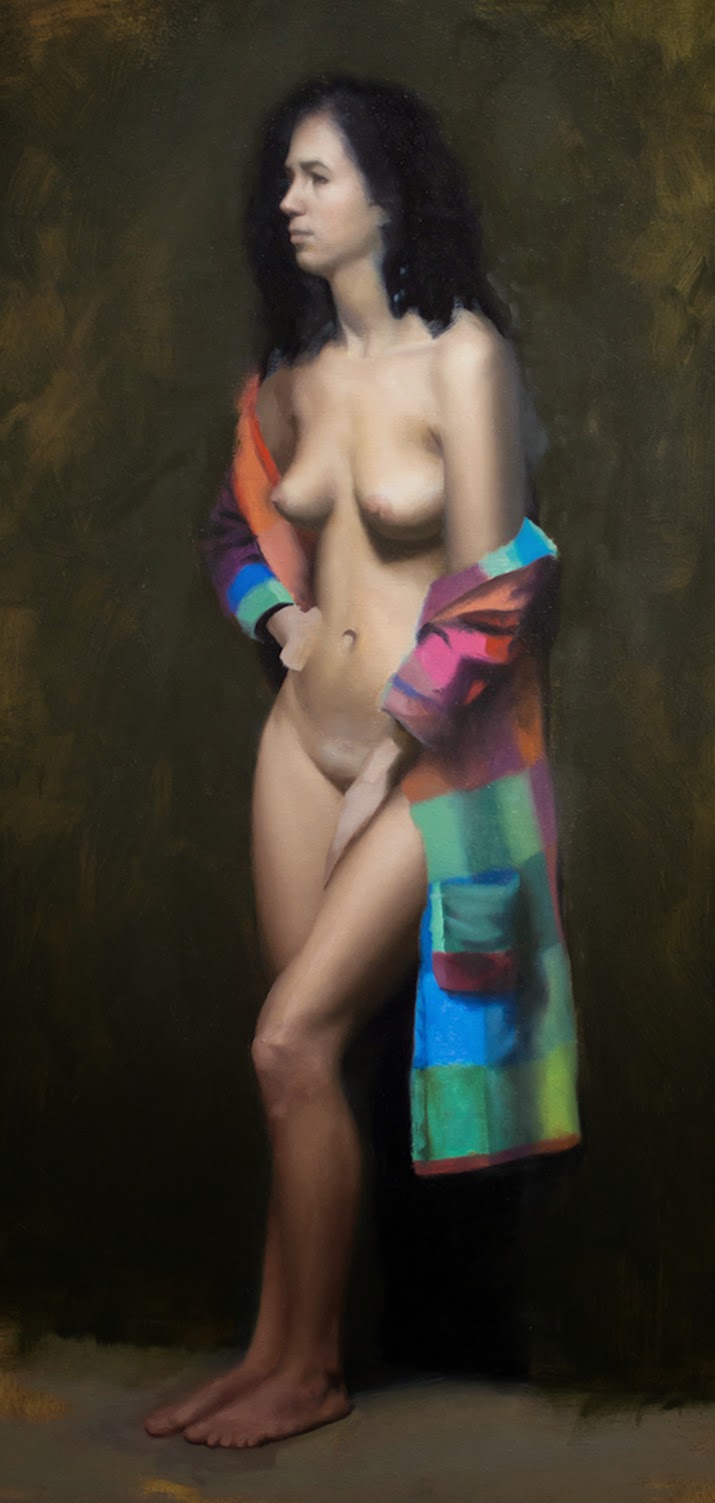
Day 24 - Last day!
Last 3 days I spent repainting both upper legs as well as the hand.
So there was quite a lot of repainting during the whole process, some things were painted twice while some three times.
If you count the big form modelling and 1st painting as well, we are up to 5 layers!

Hope you enjoyed seeing this process!

And just for fun, and because I like making GIF's here's the whole process in 11 seconds =)


Figure painting

This was my 2nd to last figure painting at Angel academy.

Saturday, February 21, 2015

Just some thoughts about color

I talked to my old classmate today and we talked about the school and if i was happy now after three years.

It got me thinking back to the time i had at the pre-art school i went to before.
What i really enjoyed about painting was to explore things.
Be it some kind of light phenomena  or something. But it was always in a very enthusiastic and scientific way. I wanted to learn and figure out what i saw in nature.
After three years at the school and the last year of painting still life and the model.
I started to feel i wasn't learning anything anymore. It was just another still life or just another model. My problem with the figure i realized was the limited palette of mainly 2 colors in the red family. (burnt umber+red umber)
I wanted to paint what i saw. And what i saw was yellows and greens.. and red of course. So today I went ahead and put some yellow ochre pale on my palette. And everything was great. I was having fun again.

I understand however the benefit of using a limited palette. Especially in a school situation.
I also understand that with color everything is relative.
Let me explain. We have on our palette, burnt umber, red umber, venetian red, black, white.
Shadows = burnt umber
Dark halftones = burnt umber/red umber mixture
Light half tones = red umber/burnt umber mixture
Red accents = venetian red

So when you use venetian red in the knees, feet, hands, and head. The red umber will look quite yellow in comparison. So as a whole the lights reads as quite yellow.
Also red umber looks quite red straight out of the tube but does change towards orange/yellow when adding white.

If you however add yellow ochre on your canvas. The red umber would look red.
Anyway. I think that with yellow ochre I could achieve a more accurate representation of what I saw.


Friday, February 20, 2015

Still life update

Drawing stage completed.
Its important to get the proportions right.
But details doesn't matter, they will disappear anyway when putting on color, so its a waste of time.
Also the perishables will be replaced when its time to paint them, a week from now.
So when drawing them I just tried to think about the overall design but not being very particular with articulation.


This is the 2nd stage called dead coloring.
It is one flat color for the lights and one for the darks.
The reason for this stage is that you want to fill the whole canvas with color and values so that you can start doing qualified decisions later in the painting process.
I did also model the pot instead of just putting one flat color. Just makes it easier, jumping a step.
I painted a high chroma mixture for the onions. It's easier to darken and lower the chroma later, than raising it.


Monday, February 16, 2015

Start of a still life

So i'm starting a new still life, which will be my last at Angel Academy of Art.
I thought I would share the process. 

The rules for this still life was that the background needs to be a relief, it cant be flat.
There should be some perishables.
And at least one man made object. 

To start off I decided to go with a brick wall background.
First I found some bricks outside that were nice and rugged.
But I didn't have enough of them so I bought some new ones.
I then had to make them look as rugged as the first ones. 
And then I had to paint them darker.
Having darker objects in the back and lighter objects in the front will help with the illusion of space. 

And here is the finished wall.
After I setup the background I started to think about what kind of man made object I wanted.
Since the wall is rugged and a bit old looking I needed another similar object.
So I got to borrow this old pot on the right.
I also got a smaller pot which is new, but I will paint it to make it fit in.
After that I went to Coop and bought lots of perishables.
Then it was just a matter of trying out different compositions,
taking photographs of all the different ones, and then decide which one I like the best.

And this is the final setup. On the right I have a canvas which is a bit too big but that's ok, I will crop it later. Also it has a base layer (campitura)  with titanium white+burnt umber.
There is one more step which is to cast a shadow on the background, I will post another picture of that later